In the best conditions it can feel difficult to use Selenium WebDriver to run UI tests on Internet Explorer. Running on the same machine you develop on isn’t realistic as WebDriver for IE requires all of the window focus. So you move it into a virtual machine on your box and then find that your machine can’t give up enough resources to reliably run the UI test suite you’ve built out. Even opening a new application on the host machine can cause the tests running in the virtual machine to fail. All that being said you want to have testing done somewhere else, that you don’t have to see, where it won’t be interrupted and have it all run every time you commit to source control. Our team is starting with Jenkins and automatic provisioning of Elastic Compute Cloud (EC2) servers in Amazon Web Services (AWS).
Asking for help running UI tests on Internet Explorer in this setup seemed to result in short replies of “no”. I won’t tell you about all the wrong paths I took getting to this solution. This tutorial of sorts makes several assumptions about where you are in the setup and what you already know how to do. For example, I had no Jenkins administration experience before doing this, I didn’t sign up for AWS, and I never setup any security credentials before starting this task.
- I will not go into any specifics of running UI testing against IE because you’ve already got tests passing when run locally.
- You already have a Jenkins install running and are comfortable enough to break things.
- This Jenkins install has the EC2 plugin and has been connected to AWS
- You’ve been given access to an AWS account where you can spawn instances with wild abandon.
- You’ve got a PEM file for said AWS account to decrypt your instance’s administrator password.
- You aren’t afraid of a little command line work.
- You’re ready to do some Windows configuration.
- And finally, you’re prepared to have patience.
This process involves:
- Create a new EC2 instance
- Configuring that EC2 instance to automatically login as an administrator
- Setting up the EC2 instance to register itself on your Jenkins build server
- Creating an AMI of this EC2 instance
- Adding or using an existing Jenkins user to use on the slave instances
- Configuring the Jenkins EC2 plugin to connect to the AMI we created
- Adding our own User Data information to the Jenkins EC2 configuration
- Start a build, launching an EC2 instance and starting the local process
- See success as this instance launches Internet Explorer from your UI test suite and watch as your tests pass because Selenium WebDriver can interact with IE.
AWS Setup
After signing into AWS and navigating to the EC2 console screen you want to launch a new instance.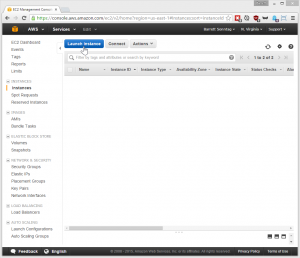
This example test machine will be on Microsoft Windows Server 2012. I used an M3.Large instance but you might be able to get away with less machine.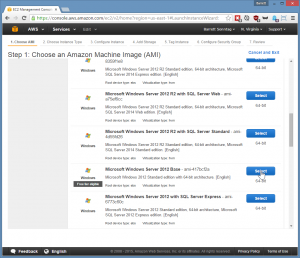
When you get to the step to configure the instance’s security group you’ll want to create a new group or select an existing group that has the RDP protocol open to a machine you’ll be connecting from. 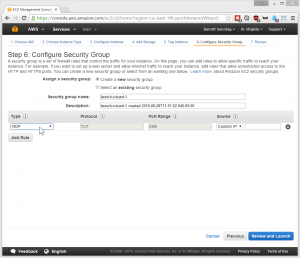
Back on the EC2 instances console, when the machine state is green and running you’ll want to collect the administrator account password by right clicking on the instance and selecting Get Windows Password. Then after you’ve decrypted and copied the Windows admin password you need to right click on the menu again to connect to this instance. 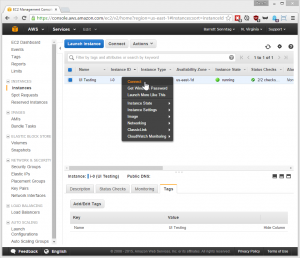
Once you’ve gotten into Windows the first thing we’ll do is create another account and add it to the administrator security group. Open up the Control Panel, then User Accounts, then User Accounts again, then click on Manage User Accounts. Here you’ll click on Add a user account. 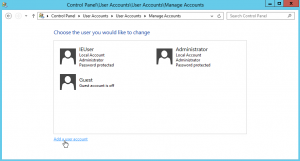
Once you’ve created that account, navigate back to the Manage Accounts screen and select that new User. Then select change account type, and change it to Administrator. 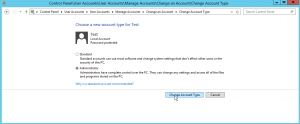
Now we need to set that user to automatically login and go to the desktop when Windows starts up. Use the shortcut Windows+R to open the Run dialog and enter the command control userpasswords2. 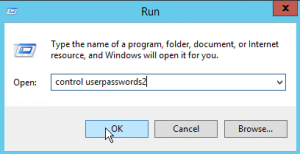
In the User Accounts window that appears you’ll want to uncheck the first option requiring users to enter a password to use the computer. 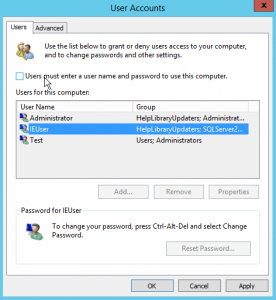
When you click OK you’ll want to enter the user name and password for that new administrator account you created. 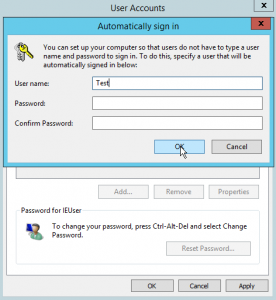
Test Environment Setup
At this point it’s time for you to setup this machine. Go through installing everything you need to build and test your project. Build and test your project, make sure IE UI tests run. You want every thing to be green here. Get it all prepared because we’re going to freeze this as an AMI to be used on demand by Jenkins. After you’ve done all that we need to download a couple of files that I wrote to configure this machine when it launches to connect to Jenkins and register itself as the slave it should be.
You’ll need to install Java, wget and Python 2.7 on the system. I used Chocolatey for my configuration. After that save this file to your users directory, ie: C:\Users\Test, and named it jenkins-slave-start.py.
Then download a batch file we’ll use to run this script and save it to the same directory, ie: C:\Users\Test, and named it slave.bat.
Run both files to make sure they work. They won’t really work right now we have other configuration to do but it will verify they are linked and you have Python installed.
What this Python script does is look at the EC2 User Data values that will be set by Jenkins later. It then connects to Jenkins as a slave, run by this administrator user and in an active session. This is the one weird trick in getting Internet Explorer UI testing to work. It demands an active and interactive session, which is why it was such a pain to run anywhere.
AWS Setup Continued
To finish setting up the instance we need to add a new task to run our startup slave script every time the system starts. If you’re unsure where the Task Scheduler is you can use the Run dialog again and enter the command %SystemRoot%\system32\taskschd.msc /s. When you click Create Task on the right of the Task Scheduler the first thing to do is make sure you’ve got Run with highest privileges checked. 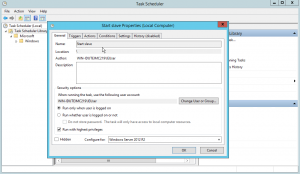
Select the Triggers tab and add a trigger to run this task at login.
Now select the Actions tab and create a new Start a program action pointed to our batch file. Be sure to use the format cmd /k “path/to/my/batch/file”. 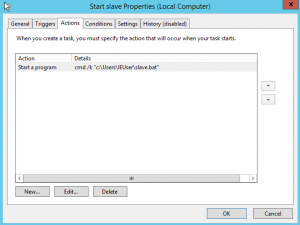
Go ahead and reboot the instance and then log back in with your custom admin account. You should be presented with a cmd prompt and a unsuccessful script launch. 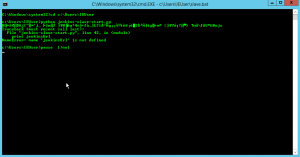
If you’ve gotten this far then go back to the EC2 console, right click on our running instance and select Image, then select Create Image. 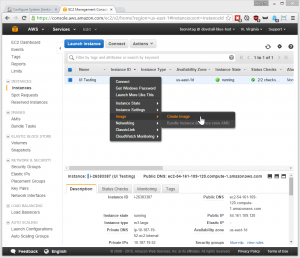
Now navigate over to the AMIs page on the right navigation and you can see the new AMI pending. Save the AMI ID at this time we’ll need to use it later in Jenkins.
Jenkins Setup
Set aside AWS for a bit and lets take a look at Jenkins. We’re going to be collecting information to populate our instance’s user data property as well as configure a few other connections. If you don’t already have the EC2 Plugin installed do so at this time. After installing it take some time to look around and familiarize yourself with the setup. I’ve assumed you’ve already got this part connected to AWS. We need to collect a few pieces of information along the way to help get the slave system connected properly.
- The URL for our build server
- A user that has permission to start slave machines
- That user’s username
- That user’s API token
- A prefix by which our Jenkins’ slaves are named which is conventional
As I presumed earlier you already have the Jenkins build server that our instance will be able to access. Save that build server URL now as it completes our first requirement. If you don’t already have a user created or want to create a new user for launching these slaves do so at this time to take care of our second requirement. Now go to that users profile page and click the Show API Token button. ![2015-08-28 13_40_31-User ‘Barrett Sonntag’ Configuration [Jenkins]](https://sosuke.com/wp-content/uploads/2015/08/2015-08-28-13_40_31-User-‘Barrett-Sonntag’-Configuration-Jenkins-300x247.png)
This User ID and API Token fulfill our third and fourth requirements so hang onto those values. ![2015-08-28 13_40_50-User ‘Barrett Sonntag’ Configuration [Jenkins]](https://sosuke.com/wp-content/uploads/2015/08/2015-08-28-13_40_50-User-‘Barrett-Sonntag’-Configuration-Jenkins-300x247.png)
The fifth requirement can be found when configuring the EC2 plugin for Jenkins. Go to Manage Jenkins, then Configure System, then on the very bottom click Add a new cloud, then configure that cloud. After that click the Add button under this cloud. Here your Description field is what will set your slave name prefix. I suggest not using spaces, but if you go crazy just make sure to URL encode it and then save this value off to fulfill the fifth requirement. Set the AMI ID to the same ID we collected earlier for our EC2 AMI. Be sure to set the FS root, for my examples I used “c:\jenkins”. Set the remote user as the user you created earlier and the set the AMI Type to windows and enter the user’s password there. Set the boot delay to 180 as recommended. ![2015-08-28 15_28_30-Configure System [Jenkins]](https://sosuke.com/wp-content/uploads/2015/08/2015-08-28-15_28_30-Configure-System-Jenkins-300x258.png)
Now click Advanced under these options. It’s time to use all the variables you saved to build our User Data values.
- JENKINS_URL is the build server URL
- SLAVE_PREFIX is the AMI description
- USER_NAME is the user’s username you saved
- USER_TOKEN is the user’s token you saved
JENKINS_URL=http://bld.tld&SLAVE_PREFIX=TestIE&USER_NAME=bsonntag&USER_TOKEN=mytoken
Verify User Data Injection in AWS
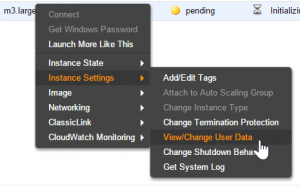
At this point you should be able to spawn a new instance with Jenkins by starting a build and see that User Data. Go back to the EC2 console after starting a build and find the new instance that was provisioned. Right click on it and select Instance Settings, then select View/Change User Data.
The code there should have a USER_DATA value, but the value is base64 encoded so it looks nothing like what we entered before. 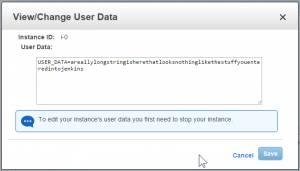
That is okay because the script we setup in the EC2 AMI is already configured to decode that. At this point your build should be working, to check it out you can connect into this instance and login using your custom user credentials we made at the beginning. You can see the command window open up from the scheduled task and start debugging as necessary or celebrate a successful build.
![2015-08-28 15_30_17-Configure System [Jenkins]](https://sosuke.com/wp-content/uploads/2015/08/2015-08-28-15_30_17-Configure-System-Jenkins-300x258.png)
Pingback: Setting the desktop resolution of an Amazon EC2 Windows Instance | Barrett Sonntag