I forgot to mention something in the guide I made on Running UI tests in Internet Explorer with Jenkins on AWS. The default resolution is very small and quite possibly too small for the WebDriver to ‘click’ on elements that might appear off screen. There are many registry hacks out there that all claim to be able to set the desktop resolution on Windows Server 2008 or 2012. When you connect via Remote Desktop the resolution is set to your machines resolution but that does not persist when Jenkins spins up the instance.
By using TightVNC you can get around this issue though. When you start a new instance from the other AMI we created before you’ll need to add in TCP port 5900 for VNC. After connecting to your instance install TightVNC you need to start the server and then log out or close out of your Remote Desktop session. Install TightVNC locally and then connect to the instance you’ve got running now. You’ll actually see the Windows login prompt instead of being sent right to the desktop. After logging in we can set the resolution to its maximum.
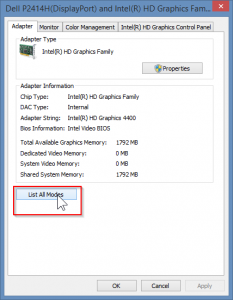
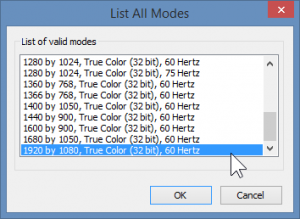
From this VNC session you need to get to the display adapter properties window. You can do that by right clicking on the desktop and opening the Screen Resolution window, then clicking on Advanced Settings. On the display adapter properties window click List All Modes.
From here you can select the highest possible resolution setting. I was able to select a 1280×1024 resolution.
Now that the resolution is set you need to disable that TightVNC server or simply uninstall it. Then go back into your AWS console and create a new AMI from that running instance you had. Make sure not to add the 5900 port back in the next time you start an instance from that AMI. The next time Jenkins connects up the resolution it ‘sees’ will be the one you just set. I wanted 1600×1200 or higher but I was happy to be able to change it at all!
Thanks to slhck for their solution to the question “How do I change the resolution of an Amazon EC2 Windows Machine?”

